
Home Exercise Library
Heel Raises (two legs, then one)
Demonstration video: Standing Bilateral Heel Raises (Baptist Health (South Florida)). Follow the steps on this page if the video differs.
In our programs
- Knee and Ankle, Phase 3 KA-3 #3
- Knee and Ankle, Phase 4 KA-4 #3
The dose and steps can differ by program.
Knee and Ankle, Phase 3: Double-Leg Heel Raises KA-3 #3
Calf strength
Photos
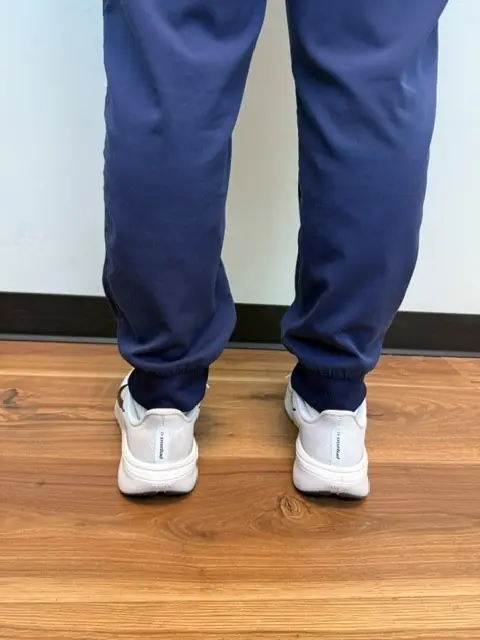
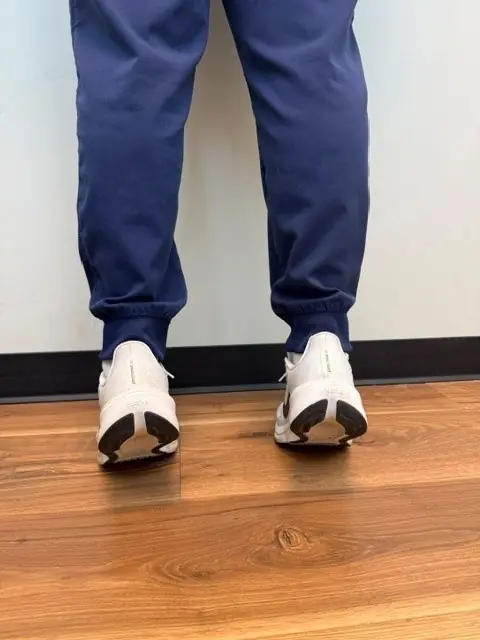
Why it helps
The calf muscle pushes you off the ground every time you take a step. After a leg injury, it loses strength fast. Double-leg heel raises work on calf strength before progressing to single-leg work next phase.
How to do it
- Stand tall with feet hip-width apart, facing a wall or counter. Fingertips lightly on the surface for balance only.
- Slowly press up onto the balls of both feet. Lift as high as you can.
- Hold the up position for 2 seconds. Squeeze the calf muscles.
- Slowly lower the heels back to the floor with control (2 to 3 seconds down).
- Do 15 reps.
Too hard? Try this
Hold the wall with both hands for more support. Or do 10 reps. Or only go halfway up.
Too easy? Try this
Take fingers off the wall completely. Or do them with toes elevated on a small book (deeper range).
Common mistakes
- You rush the descent.
- You let the ankles roll inward or outward at the top.
- You lean on the wall too hard.
You should feel
- Strong work in the calf muscles.
- Tall, balanced posture.
You should not feel
- Sharp pain in the Achilles area.
- Sharp pain in the front of the ankle.
- Cramping that does NOT let up.
Stop right away if
- Sharp Achilles pain.
- Calf pain with redness, warmth, or swelling.
- Sudden inability to push up.
If you are one of our current patients, call the clinic and inform your provider right away, or seek emergency care right away. For a life-threatening emergency, call 911.
Knee and Ankle, Phase 4: Single-Leg Heel Raises KA-4 #3
Advanced calf strength
Photos
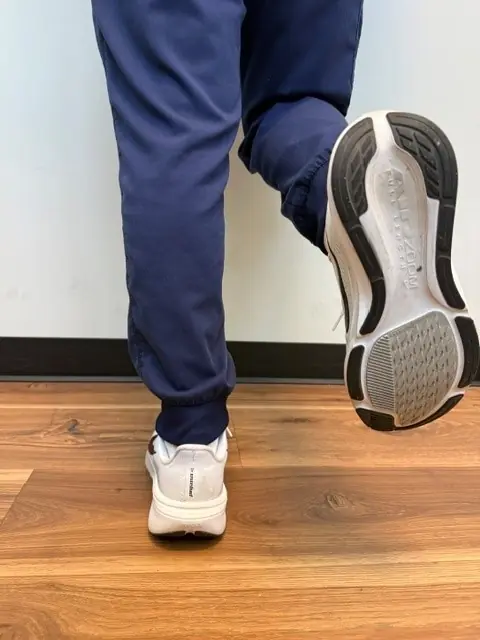
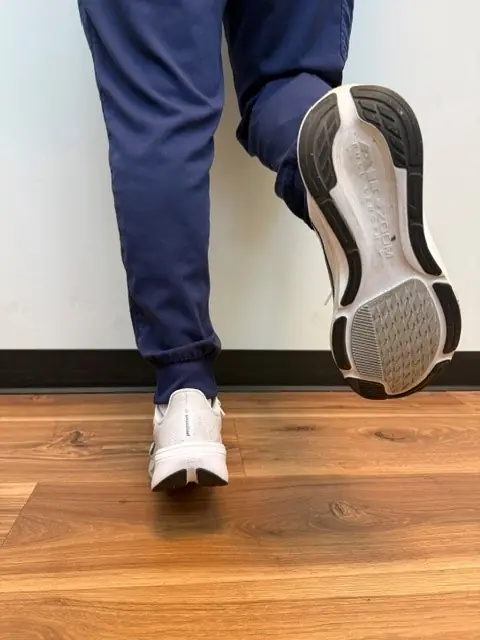
Why it helps
Single-leg heel raises load one calf with your full body weight, which is what walking and running require. They build on the double-leg heel raises from Phase 3.
How to do it
- Stand on one leg, with fingertips lightly on a wall or counter for balance only.
- Slowly press up onto the ball of the foot. Lift as high as you can.
- Hold 2 seconds at the top.
- Slowly lower back to the floor with control.
- Do 10 reps. Switch sides.
Too hard? Try this
Use both hands on the wall. Or do 5 reps. Or keep the other foot lightly touching the floor (instead of fully lifted) for some support.
Too easy? Try this
Take fingers off the wall. Or stand on the edge of a step so the heel can drop below the toes (deeper range).
Common mistakes
- The ankle rolls inward or outward at the top.
- You drop down quickly without control.
- You hold the wall too hard for support.
You should feel
- Strong work in the calf.
- Steady balance on one leg.
You should not feel
- Sharp Achilles pain.
- Cramping.
Stop right away if
- Sharp Achilles pain.
- Calf pain with redness or warmth.
- Sudden inability to push up (possible Achilles tear).
If you are one of our current patients, call the clinic and inform your provider right away, or seek emergency care right away. For a life-threatening emergency, call 911.
Research behind this program
- Doherty C, Bleakley C, Delahunt E, Holden S. Br J Sports Med, 2017. PMID 28053200
Auto Injury Chiropractic
Same-day visits at three clinics
Oregon City
1404 Molalla Ave
Oregon City, OR 97045
Mon to Thu 9:00am to 6:00pm
Fri 9:00am to 1:00pm
Milwaukie
13152 SE Rusk Rd
Milwaukie, OR 97222
Mon to Thu 9:00am to 6:00pm
Fri 9:00am to 1:00pm
Troutdale
233 E Columbia River Hwy
Troutdale, OR 97060
Mon to Thu 9:00am to 6:00pm
Fri 9:00am to 1:00pm