
Home Exercise Library
Diaphragmatic (Belly) Breathing
Demonstration video: Diaphragmatic breathing (NewYork-Presbyterian Hospital). Follow the steps on this page if the video differs.
In our programs
- Neck and Whiplash, Phase 1 NK-1 #1
- Upper and Mid Back, Phase 1 MB-1 #1
- Low Back and SI Joint, Phase 1 LB-1 #1
- Shoulder, Phase 1 SH-1 #1
- Hip, Phase 1 HP-1 #1
- Knee and Ankle, Phase 1 KA-1 #1
- Wrist and Hand, Phase 1 WH-1 #1
The dose and steps can differ by program.
Neck and Whiplash, Phase 1: Belly Breathing NK-1 #1
Calms your body and neck
Photos
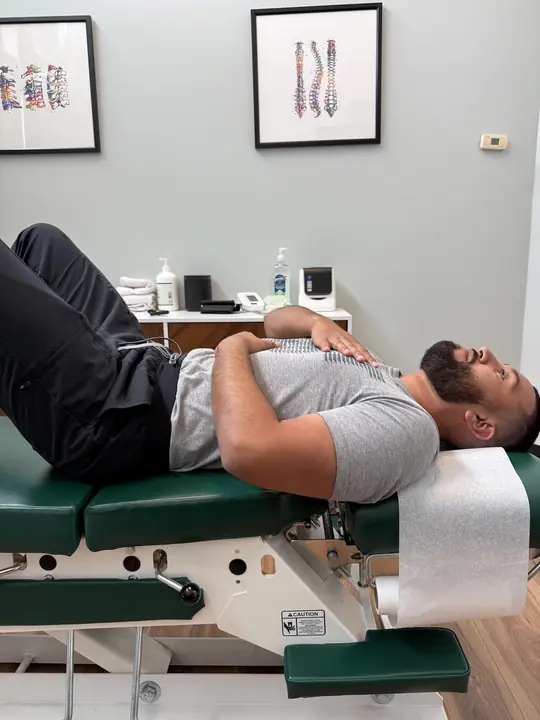
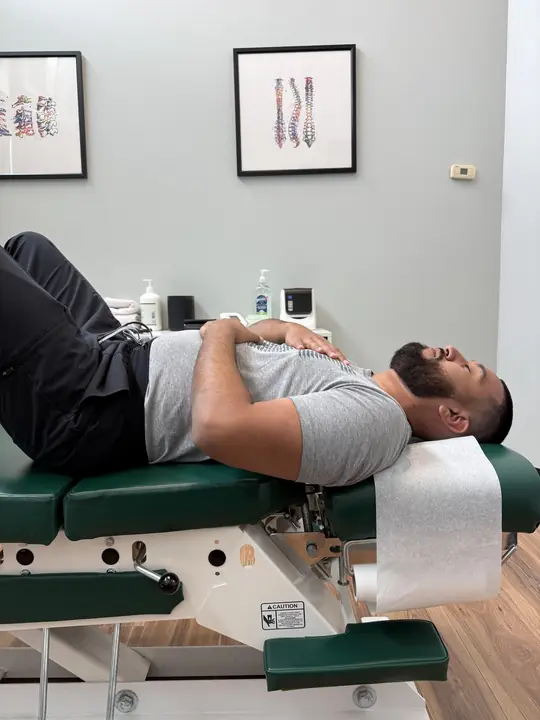
Why it helps
After a crash, most people breathe high in the chest. This makes the neck tight. Belly breathing calms your whole body and lets your neck relax.
How to do it
- Sit up tall, or lie on your back with your knees bent.
- Put one hand on your chest. Put the other hand on your belly.
- Breathe in slowly through your nose for 4 counts. Your belly hand should rise up. Your chest hand should stay still.
- Breathe out slowly through your mouth for 6 counts. Let your shoulders drop down.
- Keep going for 5 minutes. Do this 2 times every day.
Too hard? Try this
Lie on your back. Put a small book on your belly. Watch it rise when you breathe in.
Too easy? Try this
Add a small chin tuck (Exercise 2) each time you breathe out.
Common mistakes
- Shoulders go up toward your ears.
- You hold your breath.
- Your jaw squeezes tight.
You should feel
- A slow, calm belly rise and fall.
- Your shoulders feel looser.
You should not feel
- Pulling or tightness in the front of your neck.
- Sharp pain in your neck or jaw.
Stop right away if
- Chest pain or trouble breathing.
- Numb or tingly hands or face.
- A headache that gets worse.
If you are one of our current patients, call the clinic and inform your provider right away, or seek emergency care right away. For a life-threatening emergency, call 911.
Upper and Mid Back, Phase 1: Belly Breathing with Rib Awareness MB-1 #1
Calm body, expand ribs
Photos
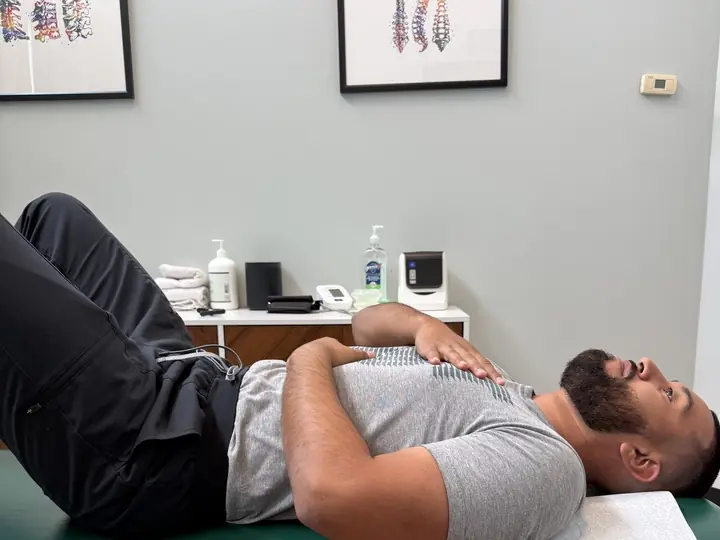
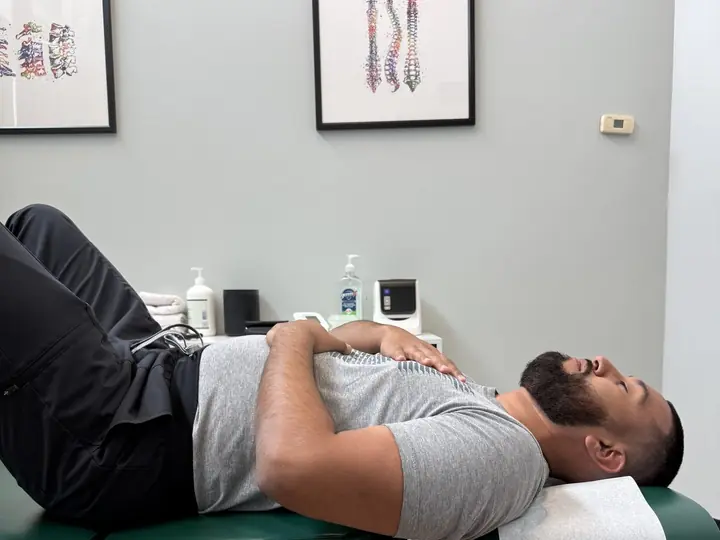
Why it helps
After a crash or back injury, most people breathe shallow and tense their upper back. Belly breathing with attention to your ribs calms your body and gently opens the muscles between your ribs.
How to do it
- Sit up tall. Or lie on your back with knees bent.
- Put one hand on your belly. Put the other hand flat on the side of your ribs.
- Breathe in slow through your nose for 4 seconds. Feel your belly rise AND your ribs spread out to the sides.
- Breathe out slow through your mouth for 6 seconds. Let your ribs settle and shoulders drop.
- Keep going for 5 minutes. Do this two times a day.
Too hard? Try this
If feeling rib movement is hard, lie on your back with a folded towel under your mid back. The pressure helps you feel the ribs expand.
Too easy? Try this
Add a slow shoulder roll back on each exhale.
Common mistakes
- Shoulders rise to your ears.
- You only feel belly motion, no rib motion.
- You hold your breath at the top.
You should feel
- Slow, calm belly rise and rib spread.
- Shoulders feeling looser.
You should not feel
- Sharp pain in your back or ribs.
- Dizzy.
Stop right away if
- Chest pain or trouble breathing.
- Sharp rib pain that gets worse with breathing.
- Numb or tingly arms or hands.
If you are one of our current patients, call the clinic and inform your provider right away, or seek emergency care right away. For a life-threatening emergency, call 911.
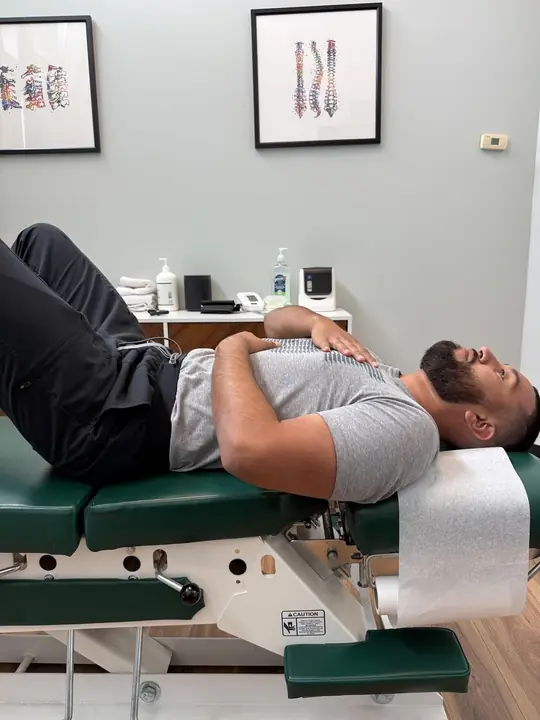
Low Back and SI Joint, Phase 1: Diaphragmatic Breathing LB-1 #1
Calm body, ease low back tension
Photos

Why it helps
After a crash or back injury, most people breathe shallow and brace their low back. Diaphragmatic breathing calms your body and teaches your deep core muscles to work with your breath.
How to do it
- Lie on your back with knees bent, feet flat on the floor. Or sit up tall in a chair.
- Put one hand on your belly. Put the other hand flat on the side of your ribs.
- Breathe in slow through your nose for 4 seconds. Feel your belly rise AND your ribs spread out to the sides.
- Breathe out slow through your mouth for 6 seconds. Let your belly settle and your low back relax into the floor.
- Keep going for 5 minutes. Do this two times a day.
Too hard? Try this
If feeling rib movement is hard, lie down with a folded towel under your low back so it presses lightly into your spine. The pressure helps you feel the motion.
Too easy? Try this
Add a small gentle pelvic tilt (Exercise 2) on each exhale.
Common mistakes
- Shoulders rise to your ears.
- You only feel chest motion, no belly motion.
- You hold your breath at the top.
You should feel
- Slow, calm belly rise and rib spread.
- Low back feeling looser.
You should not feel
- Sharp pain in your back or ribs.
- Dizzy.
Stop right away if
- Chest pain or trouble breathing.
- Sharp pain in your back that gets worse with breathing.
- Numb or tingly legs.
If you are one of our current patients, call the clinic and inform your provider right away, or seek emergency care right away. For a life-threatening emergency, call 911.
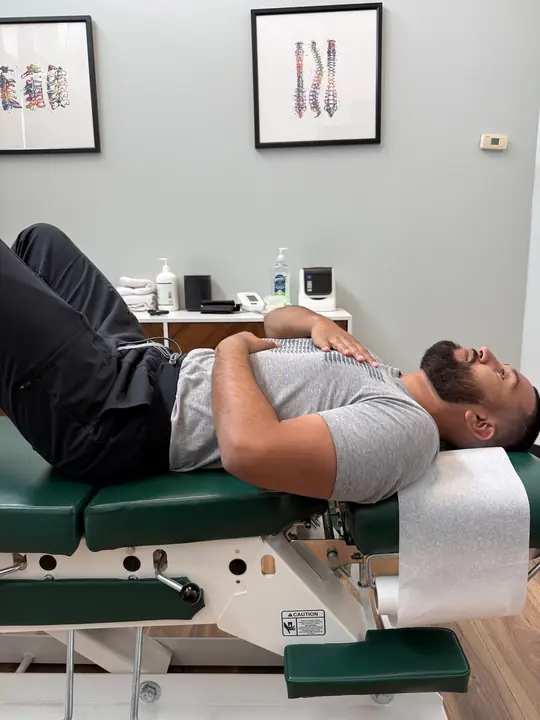
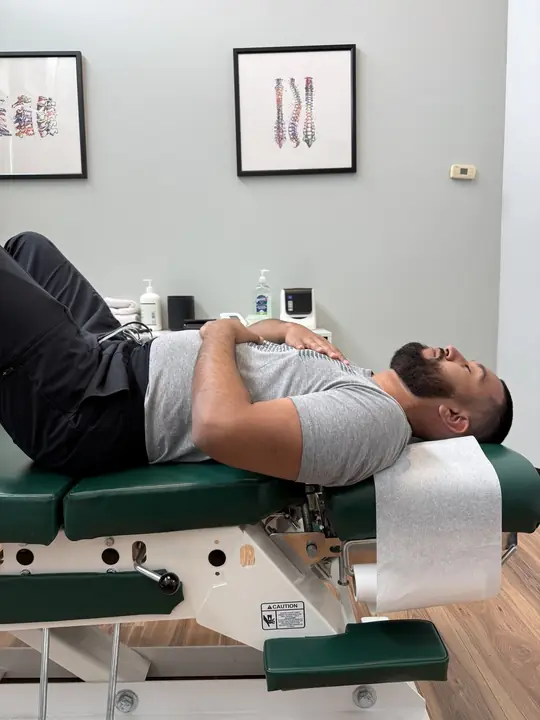
Shoulder, Phase 1: Diaphragmatic Breathing SH-1 #1
Calm body, ease shoulder tension
Photos
Why it helps
After a crash or shoulder injury, most people tense up around the neck and shoulders and breathe shallow. Calm breathing tells your nervous system that you are safe, which lets the muscles around your shoulder relax.
How to do it
- Lie on your back with knees bent and feet flat. Or sit up tall in a chair. Arms relaxed at your sides.
- Put one hand on your belly. Put the other on the side of your ribs (use the uninjured side if one shoulder is hurt).
- Breathe in slow through your nose for 4 seconds. Feel your belly rise AND your ribs spread to the sides.
- Breathe out slow through your mouth for 6 seconds. Let your shoulders and neck relax.
- Keep going for 5 minutes. Do this two times a day.
Too hard? Try this
If feeling rib motion is hard, lie down with a folded towel under your low back. Or just focus on belly motion and skip the rib part.
Too easy? Try this
On each exhale, gently let your shoulders drop down away from your ears.
Common mistakes
- Shoulders rise to your ears with each breath in.
- You only feel chest motion, no belly motion.
- You hold your breath at the top.
You should feel
- Slow, calm belly rise.
- Shoulders and neck loosening as you breathe.
You should not feel
- Sharp pain in your shoulder.
- Dizzy.
- Pain in your chest or ribs.
Stop right away if
- Chest pain or trouble breathing.
- Numbness or tingling down the arm.
- Sharp shoulder pain that gets worse.
If you are one of our current patients, call the clinic and inform your provider right away, or seek emergency care right away. For a life-threatening emergency, call 911.
Hip, Phase 1: Diaphragmatic Breathing HP-1 #1
Calm body, ease hip muscle tension
Photos
Why it helps
After a crash or hip injury, most people tense up around the hips and breathe shallow. Diaphragmatic breathing calms your body and teaches your deep core to work with your breath, which supports the hip indirectly.
How to do it
- Lie on your back with knees bent, feet flat on the floor. Or sit up tall in a chair.
- Put one hand on your belly. Put the other on the side of your ribs.
- Breathe in slow through your nose for 4 seconds. Feel your belly rise AND your ribs spread to the sides.
- Breathe out slow through your mouth for 6 seconds. Let your hips and buttocks relax into the floor or chair.
- Keep going for 5 minutes. Do this two times a day.
Too hard? Try this
If feeling rib motion is hard, put a folded towel under your low back so the back of your ribs has something to press into.
Too easy? Try this
On each breath out, gently flatten your low back into the floor by tightening your belly a little (a small pelvic tilt). Relax as you breathe in. Or add a gentle leg lift on each breath in.
Common mistakes
- Shoulders rise to your ears.
- You only feel chest motion, no belly motion.
- You hold your breath at the top.
You should feel
- Slow, calm belly rise and rib spread.
- Hip and back muscles loosening.
You should not feel
- Sharp pain in your hip or groin.
- Dizzy.
Stop right away if
- Chest pain or trouble breathing.
- Sharp groin pain.
- Numb or tingly leg.
If you are one of our current patients, call the clinic and inform your provider right away, or seek emergency care right away. For a life-threatening emergency, call 911.
Knee and Ankle, Phase 1: Diaphragmatic Breathing KA-1 #1
Calm body, ease leg tension
Photos
Why it helps
After a crash or leg injury, most people tense up and breathe shallow. Calm breathing tells your nervous system that you are safe, which helps the body relax, including the muscles around your knee and ankle.
How to do it
- Lie on your back with knees bent (or comfortable) and feet flat. Or sit up tall in a chair.
- Put one hand on your belly. Put the other on the side of your ribs.
- Breathe in slow through your nose for 4 seconds. Feel your belly rise AND your ribs spread to the sides.
- Breathe out slow through your mouth for 6 seconds. Let your shoulders, hips, and legs relax into the floor or chair.
- Keep going for 5 minutes. Do this two times a day.
Too hard? Try this
If feeling rib motion is hard, put a folded towel under your low back so your back ribs press into something.
Too easy? Try this
On each exhale, gently tighten and release the muscle on the front of your thigh (the quad).
Common mistakes
- Shoulders rise to your ears.
- You only feel chest motion, no belly motion.
- You hold your breath at the top.
You should feel
- Slow, calm belly rise.
- Whole body relaxing.
You should not feel
- Sharp pain in your knee or ankle.
- Dizzy.
Stop right away if
- Chest pain or trouble breathing.
- Sudden swelling in the leg.
- Calf pain with redness or warmth.
If you are one of our current patients, call the clinic and inform your provider right away, or seek emergency care right away. For a life-threatening emergency, call 911.
Wrist and Hand, Phase 1: Diaphragmatic Breathing WH-1 #1
Calm body, reduce upper-limb tension
Photos
Why it helps
After a crash or wrist injury, most people tense up through the arms and shoulders and breathe shallow. Calm breathing tells your nervous system that you are safe, which lets the muscles around your hand, forearm, and shoulder relax.
How to do it
- Lie on your back with knees bent and feet flat. Or sit up tall in a chair. Hands resting in your lap or at your sides, palms up.
- Put one hand on your belly. Put the other on the side of your ribs (use the uninjured side if one hand is hurt).
- Breathe in slow through your nose for 4 seconds. Feel your belly rise AND your ribs spread to the sides.
- Breathe out slow through your mouth for 6 seconds. Let your shoulders, arms, and hands relax.
- Keep going for 5 minutes. Do this two times a day.
Too hard? Try this
If feeling rib motion is hard, lie down with a folded towel under your low back. Or just focus on belly motion and skip the rib part.
Too easy? Try this
On each exhale, slowly open and close your hands once with the breath.
Common mistakes
- Shoulders rise to your ears with each breath in.
- You only feel chest motion, no belly motion.
- You clench your hands during the breath.
You should feel
- Slow, calm belly rise.
- Arms and hands relaxing.
You should not feel
- Sharp pain in your wrist.
- Dizzy.
- Tingling in your hand that gets worse.
Stop right away if
- Chest pain or trouble breathing.
- Numbness or tingling in the hand getting worse.
- Hand getting cold or pale.
If you are one of our current patients, call the clinic and inform your provider right away, or seek emergency care right away. For a life-threatening emergency, call 911.
Research behind this program
- Sterling M, Smeets R, Keijzers G, et al. Br J Sports Med, 2019. PMID 30661011
- Hamasaki H. Medicines (Basel), 2020. PMID 33076360
Auto Injury Chiropractic
Same-day visits at three clinics
Oregon City
1404 Molalla Ave
Oregon City, OR 97045
Mon to Thu 9:00am to 6:00pm
Fri 9:00am to 1:00pm
Milwaukie
13152 SE Rusk Rd
Milwaukie, OR 97222
Mon to Thu 9:00am to 6:00pm
Fri 9:00am to 1:00pm
Troutdale
233 E Columbia River Hwy
Troutdale, OR 97060
Mon to Thu 9:00am to 6:00pm
Fri 9:00am to 1:00pm